I’ve been deep in prep mode for my upcoming 2-week workshop at Penland School of Craft—mapping out demos, prepping handouts, and revisiting some of my favorite dye processes. One of the techniques I’m especially excited to share is dyeing with dried indigo leaves. Here, I share the steps and findings on my variation on creating a dried leaf indigo vat using hot water, lime, and fructose.
All this prep has reminded me of why I love to teach. Teaching and sharing motivates me to deepen my relationship with the materials I work with, so I can speak from my own experience during a workshop.
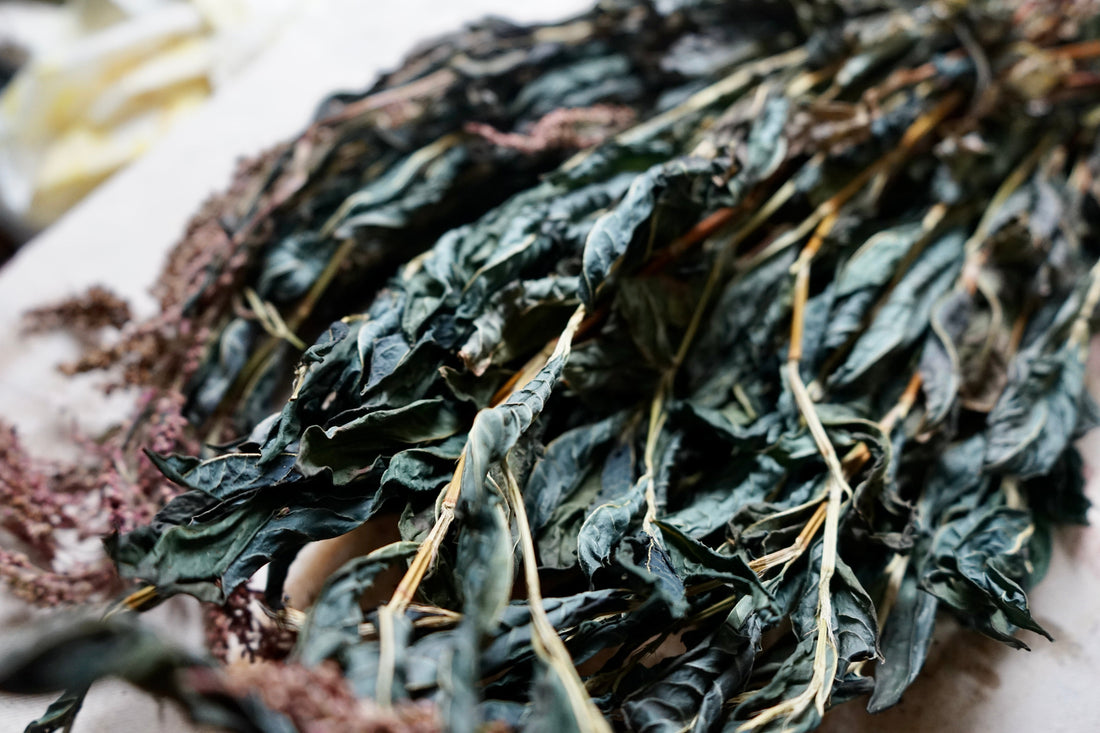
Last September, just before I had my son, I harvested the last of my indigo plants. At 40 weeks pregnant, I wasn’t about to do a pigment extraction. So instead, I bundled the stalks and hung them upside-down in my cool, dark basement—about ten bunches.

Can You Dye with Dried Indigo Leaves?
Yes! If you are growing indigo (in this demo I use Persicaria tinctoria), you can absolutely dry it for later use. I’ve successfully dyed with dry indigo leaves that were over three years old. There’s no strict expiration date, as long as the leaves were dried and stored properly—out of the sun and in a cool, dry space.
You can do multiple harvests of indigo throughout a growing season. In my climate, I harvest three or four times throughout the season—in mid-June, July, August, and then before the first frost. The general rule is to harvest early in the morning before the first sunlight hits your crop. I like to dry my indigo in bunches with the stalk still on, but I know other dyers who strip the leaves off when harvesting. It just depends on how you want to go about drying your leaves. You can either hang them to dry in bunches, or lay the stripped leaves out on a screen if you live in a really arid climate.
 As the indigo dries, the cell walls in the leaves begin to break down, allowing the indigotin pigment to interact with enzymes and oxygen. This transformation turns the leaves blue over time and sets the stage for future extraction.

How to Make a Dried Leaf Indigo Vat (Fructose Vat Method)
The dried indigo leaves had been sitting in my basement for almost nine months. It was the very end of the season and my plants had well gone to seed, so I imagined the pigment level was low. I decided to experiment anyway. I brought out my well-loved copy of “Singing the Blues” by John Marshall. This book is full of incredible information. In it, John Marshall shares a recipe for dyeing with dry indigo leaves that involves reducing the indigo using thiox or sodium dithionite. Bringing these chemicals to high heat causes harmful vapors, so I decided to try reducing the indigo with my trusty fructose powder and calcium hydroxide.
Materials + Equipment
- Dried indigo leaves (100 grams)
- Calcium Hydroxide (30 grams total)
- Fructose Powder (45 grams total)
- Stainless steel pot
- Spoon
- Colander or strainer
- 5-gallon bucket
- Stove
- Gram scale
Step one
Strip the dried indigo leaves (if you haven’t already). Weigh the leaves on their own without the stalk. Measure out 100 grams of dried indigo leaves.
Step two
Bring 5 liters of water to a simmer in your stainless steel pot. Add 100 grams of dried indigo leaves and simmer for 20 minutes Step three
Strain off the leaves and dispose of the water. You will notice it is a deep yellow.
 Step four
At this point, my pH was around 9.

Step five
After simmering, strain off the leaves and collect the liquid in your 5-gallon bucket. The liquid color is a deep yellow.
Repeat steps four and five two more times, continuing to strain the leaves, collect the liquid in your 5-gallon bucket, and simmer the same leaves in water with calcium hydroxide and fructose powder.
After the second and third extraction, you should see an indigo flower collect on the surface of your liquid. At this point my pH was around 11.

Step six
Now it’s time to dye! Add pre-wetted fabric to your indigo vat, following the standard indigo dyeing rhythm: dip, oxidize, repeat to build up depth of color.
Rinse and neutralize your fabric just as you would with any other indigo vat.
Final Thoughts on Dyeing with Dried Indigo
Working with a dried leaf indigo vat is deeply satisfying—it allows you to preserve the harvest and work with it long after the season ends. While fresh-leaf dyeing has its own magic, dyeing with dried indigo offers a different kind of flexibility.

I believe my colors will be deeper if I harvest and dry my leaves earlier in the season, before they go to seed. I am going to test this again with leaves harvested in the early and mid-summer.
Resources
Many thanks to John Marshall for the recipe that inspired this experiment. If you’re curious to try it yourself, a handful of dried leaves and a few simple ingredients are all you need to start your own dried leaf indigo vat at home.
After I made this vat, I saw a video Michel Garcia posted to his YouTube channel that shows an incredibly simple process of making a dried leaf vat using tropical indigo (indigofera suffruticosa) just using water and hydrated lime. If you have access to that variety of indigo, try this technique out!
Thanks to you all for inspiring me to continue to test and experiment with plants, and reminding me why I love to teach. Please share your experiments and findings as you test out your own leaves.