If you are reading this guide, it’s likely you are growing some type of indigo bearing plant in your garden. As I write this, the indigo pigment is at its peak. We’re told to harvest on the hottest day of the year. Well, here in Maryland, it is 98 degrees Fahrenheit with 60% humidity. (I hope it doesn’t get hotter than today this summer).
Dyeing with fresh indigo leaves is an incredible way to use the plant. It is less labor intensive than doing a full extraction, and is a fun way to check your pigment level at any point in the season. I will outline two beginner-friendly methods in this guide: cold water extraction and the salt rub method. Both methods work best with freshly harvested Japanese indigo (Persicaria tinctoria), though you can experiment with related species too.

For either method, harvest indigo early in the morning before the sunlight hits your leaves. Both methods will yield deeper blues and greens on protein fibers, but cellulose can also yield a paler shade of blue.

Short leaf and broad leaf persicaria tinctoria
Method 1: Salt Rub Extraction
A fast, tactile way to apply fresh indigo directly to fabric—great for workshops or experimental dyeing to quickly check your pigment levels. You don’t need much! (Especially great for kids who are at the “I need to smash plants” stage.)

You’ll need:
- Fresh indigo leaves (About twice the weight of your fiber's worth)
- Non-reactive bowl (glass or stainless steel)
- Pre-wetted natural fiber —protein will yield better results but be careful with wool as the aggravation can cause your material to felt
- Kosher salt (¼ cup or more)
- Zip lock bag (optional)
Instructions
Step 1
Wet and wring out your fabric so it's damp but not dripping.
Step 2
Add your fabric to a nonreactive bowl or a zip lock bag. Add in your stripped indigo leaves and salt.
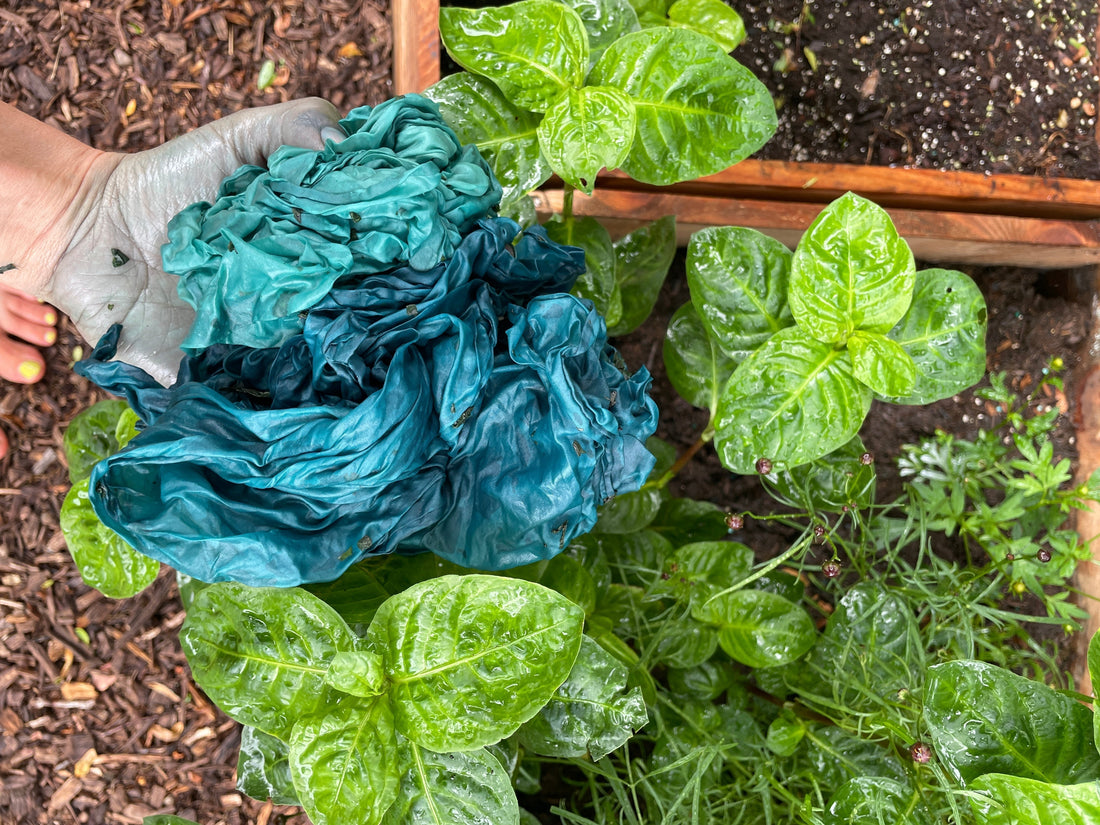
After agitating for one minute (Left); after agitating for 4 minutes (Right):

Step 3
Use your hands to rub the salt and leaves into the fabric for about 5–10 minutes. If you are using a zip lock bag, you can massage the outside. This is a great way to keep your hands clean while working with fresh leaves.

Step 4
Once you are happy with the color, rinse your fabric under cool water and let it dry in the shade.
Tips:
- Great for small pieces, scrap dyeing, or creating organic, textured patterns. The saturation will not always be even since there is no added water in the method.
- This method would not work with any kind of paste resist since we are massaging the fiber.
Method 2: Cold Water Extraction
This method is particularly wonderful on the hottest day of the year! Special thanks to John Marshall for sharing this method!
You’ll need:
- Fresh indigo leaves (approx. 2:1 leaf weight to fabric)
- Non-reactive bowl (glass or stainless steel)
- Blender
- Fine mesh strainer or cheesecloth
- Silk scarf, wool, or other protein fiber
- Cold water
- Ice cubes

Instructions:
Step 1
Use freshly picked indigo leaves—no stems. Strip them from their stalks. I like to use about twice the amount of leaves by weight of my fiber.
Step 2
Add ice to a bowl of water to get the water as cold as possible. Then, add the leaves to your blender and cover them in the water (filtering out any ice cubes). Turn on your blender!

Step 3
Strain off the leaf mixture into your nonreactive bowl using cheesecloth or a mesh strainer, keeping the tinted liquid.
Step 4
Add your pre-wetted fiber to the strained indigo liquid. Let it soak for 10–30 minutes, gently moving the fabric every once in a while to ensure an even saturation of the dye.

Step 5
Remove fabric, rinse in cool water, and hang to dry. The final color may shift as it oxidizes. You don’t need to neutralize your fabric in vinegar (as you would with an indigo vat) because the liquid is pH neutral. One less step!
Notes:
- You can continue to dip, oxidize, dip, oxidize, and repeat to deepen your color.
- This method works great for solid colors and shibori resists.

Quick Sidebar: Can you do Fresh Leaf Indigo Dyeing with Clay Resist?
I tried this method with clay paste resist, and found varying results. I tested four pieces of wild silk from Green Tailor: two printed with red clay and two printed with white clay. I let the clay dry and dipped each piece in the indigo for 5 minutes.
Since the liquid is pH neutral, the clay breaks down pretty quickly. I added a bit of soda ash (about 10 grams) to shift the liquid to pH 11, and found the clay remained intact, but the color shifted to a pale grey-blue. Worth experimenting with!
Here are my four test swatches—the column on the left was dyed in pH neutral fresh indigo liquid, and on the left the pH was 11. White clay samples are on top and red clay are on the bottom. I used the same stencil and brush to apply the print to maintain some control. The clay maintains its integrity in the alkaline indigo, but the color is not the lively fresh leaf indigo hue we know and love.

Further research
There are some great guides on working with fresh leaf indigo out there. John Marshall shared the initial fresh leaf blender method, and this YouTube video is the first time I saw the salt rub method being used. The Dogwood Dyer shared her take on the blender method. Anna Carolyn Meier shares great experiments with both methods on different fiber types and using older indigo leaves.